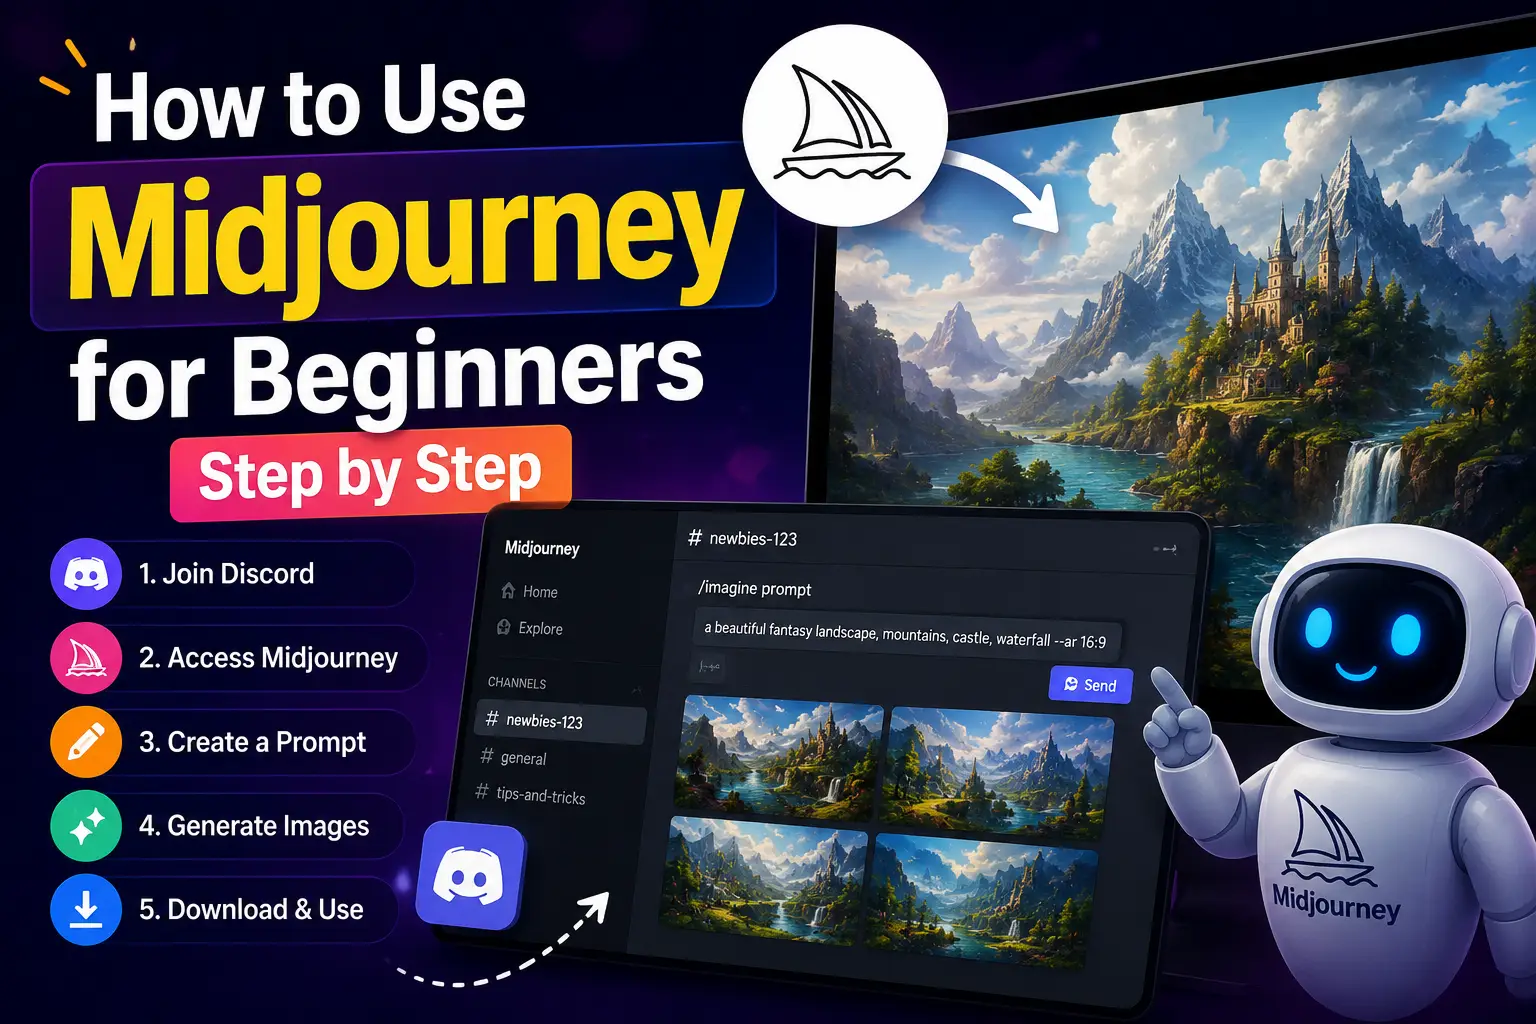
How to Use Midjourney for Beginners Step by Step: My Complete Guide
Introduction
Learning how to use Midjourney for beginners step by step felt a lot more intimidating than it actually needed to be, at least based on my own first attempt. I remember staring at a Discord server full of scrolling messages, completely unsure where to even type my first prompt.
A few weeks of daily experimenting later, I’ve figured out exactly what a first-time user actually needs to know, minus all the confusing jargon and trial-and-error frustration I went through myself. I wanted to write the guide I wish someone had handed me before I ever opened Discord.
Everything here comes from my own experience generating images, tweaking prompts, and figuring out the settings that actually matter. If you’ve been curious about AI art but felt intimidated by where to start, this guide on how to use Midjourney for beginners step by step should clear that up completely. By the end, you’ll know exactly how to get started and avoid the small mistakes that slowed me down early on.
What Is Midjourney?
Midjourney is an AI image generator that turns written descriptions into visual artwork. You type a prompt describing what you want to see, and within moments, it generates a set of images based on that description.
For anyone exploring how to use Midjourney for beginners step by step, the easiest way to understand it is this: the more specific and descriptive your prompt, the more accurate and interesting your results tend to be. It’s part creative tool, part learning curve, and honestly part fun experiment once you get the hang of it. Many beginners are surprised by how quickly it starts to feel less like operating complex software and more like having a genuinely creative conversation with the tool itself.
It’s available through Midjourney’s official website, either through their Discord server or their newer standalone web interface, depending on which feels more comfortable to you as a beginner.
Why Beginners Should Try Midjourney in 2026
AI-generated art has moved well past the novelty phase. Bloggers use it for thumbnails, small businesses use it for marketing visuals, and hobbyists use it purely for creative exploration. Whatever your reason, learning how to use Midjourney for beginners step by step opens up a genuinely useful creative skill without requiring any traditional design background.
What surprised me most is how quickly the learning curve flattens out. The first few attempts feel clumsy, but within just a handful of sessions, you start developing an instinct for what kind of wording produces the results you’re picturing in your head. That’s really the whole point of breaking this process down step by step, so you skip the weeks of confusion I went through myself.
I’ve noticed more and more beginners searching for exactly this, a clear, honest breakdown of how to use Midjourney for beginners step by step, rather than a technical manual written for people who already understand the tool. If you’re curious how it stacks up against other AI tools worth knowing about, I’ve covered a broader roundup in my Top 10 AI Tools in 2026 article.
Getting Started with Midjourney (Step-by-Step Guide)
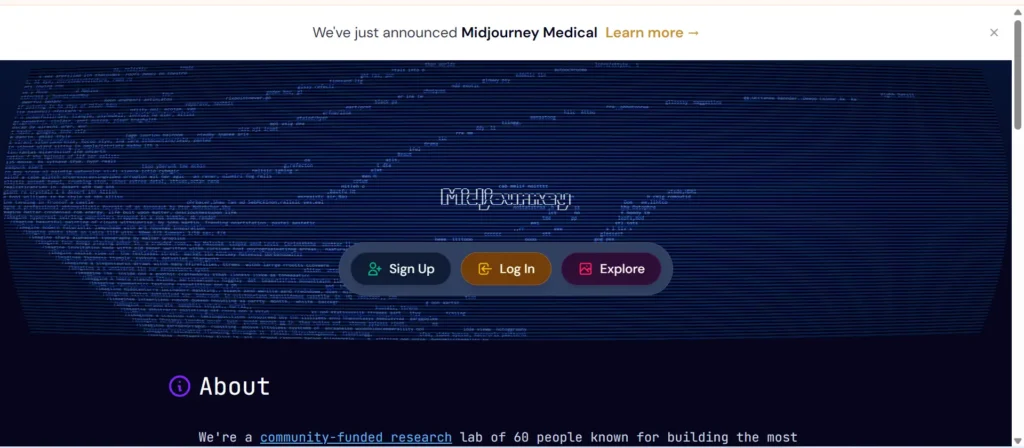
This is the part that trips up most beginners, so let me walk through exactly how I got set up, step by step, from complete scratch.
Step 1: Create a Discord Account
Midjourney operates primarily through Discord, so if you don’t already have an account, you’ll need to create one first at discord.com. This felt like an unnecessary extra step at first, but it only takes a couple of minutes and is genuinely the first real step in learning how to use Midjourney for beginners step by step.
Step 2: Join the Midjourney Server
Head over to Midjourney’s official website and follow the link to join their Discord server, or subscribe directly through their website if you prefer using their newer web interface instead of Discord. I found the web interface noticeably more approachable for a total beginner, since it skips the extra layer of learning Discord’s own navigation on top of Midjourney itself.
Step 3: Subscribe to a Plan
Midjourney requires a paid subscription to generate images, since the free trial period has become quite limited over time. Pick a plan that matches how often you think you’ll actually use it, you can always upgrade later once you have a better sense of your usage. Don’t feel pressured to pick the most expensive tier right away, since the lowest plan is more than enough while you’re still learning how to use Midjourney for beginners step by step.
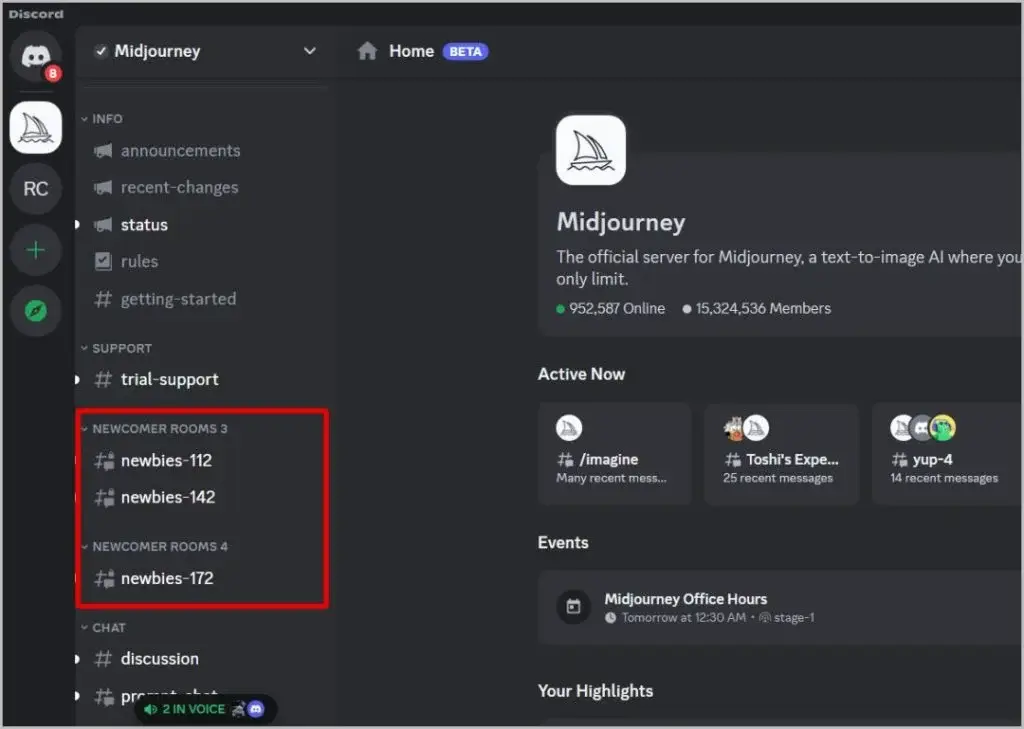
Step 4: Find the Bot Channel
Once you’re in the server, look for one of the “newbies” or general prompt channels. This is where you’ll type your commands and see your generated images appear directly in the chat, which is genuinely the most exciting first moment for any beginner. If you’re using the web interface instead, this step is even simpler, since there’s just a single prompt bar to type into directly.
Step 5: Type Your First Prompt
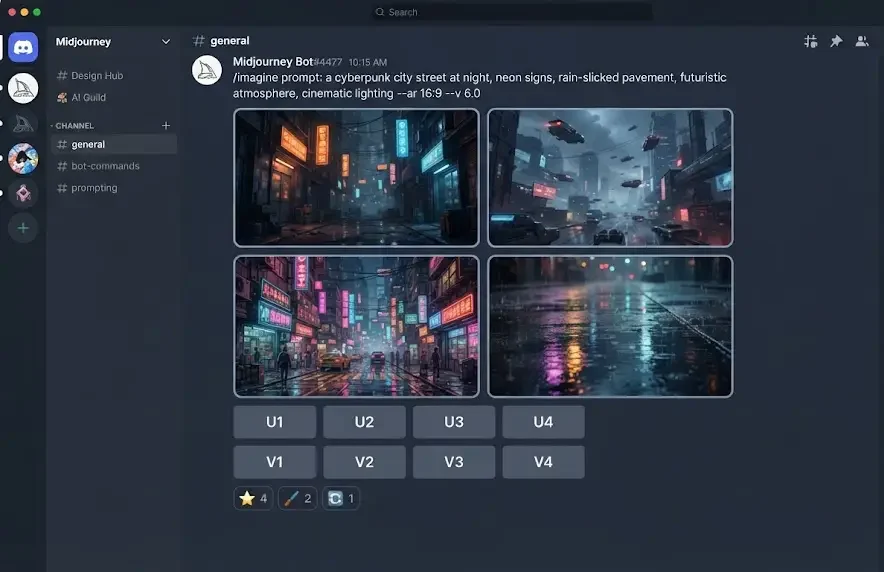
Using the /imagine command followed by your description is how you generate your first image. Something simple like /imagine a cozy cabin in a snowy forest, warm lighting is a great low-pressure way to see the tool in action for the first time. Don’t worry about making it perfect, the entire point of this first prompt is just to see the process work end to end.
Step 6: Review and Upscale Your Results
After a short wait, you’ll see four image variations appear. From here, you can upscale the one you like best for a higher-resolution version, or generate new variations based on a result you’re close to liking. This step alone taught me more about how to use Midjourney for beginners step by step than any tutorial I’d read beforehand, simply because seeing four different interpretations of the same prompt side by side made the whole process click instantly.
Understanding Midjourney Prompts
Prompt Structure Basics
The clearer and more specific your prompt, the better your results tend to be. I learned to describe subject, style, lighting, and mood separately, rather than cramming vague adjectives together. A prompt like “a fantasy castle, golden hour lighting, misty mountains, digital painting style” consistently outperforms something vague like “a nice castle picture.”
I also found it helpful to think of a prompt almost like a short creative brief you’d give a human illustrator. The more context you provide about the mood, setting, and purpose of the image, the less Midjourney has to guess, and the closer your first result usually lands to what you actually pictured.
Using Parameters
Parameters are small additions at the end of your prompt that control specific settings, like aspect ratio or style intensity. Learning even a handful of these early on made a noticeable difference in how much control I had over my results, and it’s genuinely one of the most useful things to understand early in learning how to use Midjourney for beginners step by step.
Aspect Ratio
Adding something like --ar 16:9 to your prompt changes the image’s width-to-height ratio, which matters a lot depending on whether you’re creating a blog thumbnail, a phone wallpaper, or a square social media graphic.
Chaos and Stylize Settings
The chaos parameter controls how varied your four results are from each other, while the stylize parameter controls how much artistic interpretation Midjourney applies versus sticking closely to your literal description. I’d recommend leaving both at default until you’re comfortable with basic prompts.
Negative Prompts
Sometimes it’s just as useful to tell Midjourney what you don’t want. Adding something like --no text or --no watermark at the end of your prompt helps avoid common unwanted elements showing up in your results.
Refining Your Images After the First Try
Using Variations
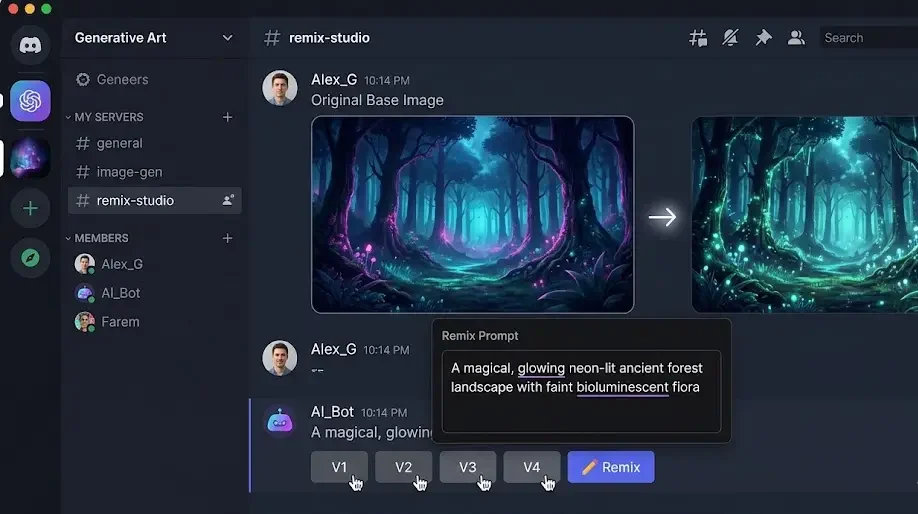
Once you generate a set of four images, you can request variations of the one that’s closest to what you wanted. This is one of the most underrated parts of learning how to use Midjourney for beginners step by step, since it lets you nudge a result in the right direction instead of starting completely over.
Remixing Prompts
Remix mode lets you tweak your original prompt slightly before generating new variations, which is useful once you’ve found something close to right but want to adjust one specific detail, like lighting or color palette, without losing everything else that worked.
Combining Reference Images
As you get more comfortable, you can upload a reference image alongside your text prompt to guide the style or composition more precisely. I’d hold off on this until you’ve mastered basic text prompts first, since it adds another layer of complexity that’s easier to appreciate once you’ve solidly grasped how to use Midjourney for beginners step by step at a fundamental level.
Best Midjourney Prompts for Beginners
A few simple prompt formulas helped me get comfortable early on. Try describing a subject plus setting plus lighting, like “a golden retriever sitting in a sunlit meadow, soft morning light.” For portraits, adding an art style like “digital painting” or “oil painting” tends to produce more polished, intentional-looking results.
For business or blog use, prompts like “minimalist flat icon of a rocket ship, clean lines, pastel colors” work well for simple graphics. Experimenting with combining an unexpected subject and setting, like “a lighthouse floating in space, surrounded by stars,” is also a fun way to explore the tool’s creative range once you’re past the absolute basics of how to use Midjourney for beginners step by step.
Midjourney Prompt Words That Actually Work
Beyond just structure, certain descriptive words consistently produce better results than others. Lighting terms like “golden hour,” “soft diffused light,” or “dramatic backlighting” give Midjourney a much clearer sense of mood than simply saying “nice lighting.”
Style references also matter a lot. Words like “cinematic,” “photorealistic,” “watercolor,” or “isometric” each pull the output in a distinctly different visual direction. I’ve found that combining a style word with a specific artist-adjacent descriptor, like “in the style of a vintage travel poster,” produces far more cohesive results than a generic style word alone.
Camera and composition terms are another underused category for beginners. Adding phrases like “wide-angle shot,” “close-up portrait,” or “aerial view” gives Midjourney useful framing information that a plain subject description simply doesn’t communicate on its own.
Finally, texture and material words like “weathered wood,” “brushed metal,” or “soft velvet” add a surprising amount of realism and depth to generated images, especially for product-style or still-life prompts.
Midjourney Community and Resources for Beginners
One thing that helped me speed up my own learning curve was spending time in the Midjourney community itself, browsing what other users were generating and reading the prompts they shared alongside their results. Many public channels display both the prompt and the output side by side, which turns into a genuinely useful, ongoing tutorial if you pay attention.
Following a handful of experienced Midjourney users, whether through the community server or elsewhere, also exposed me to prompt techniques I wouldn’t have thought to try on my own. Beginners often underestimate how much faster this kind of passive learning speeds things up compared to only experimenting in isolation.
I’d also recommend keeping a simple personal document or notes file with prompts that worked well for you specifically. Over time, this becomes your own personalized reference guide, built around your particular creative interests rather than someone else’s generic examples. It’s a similar habit to the prompt-saving approach I recommend in my Best Way to Use ChatGPT in 2026 guide, where reusing what already works saves a surprising amount of time.
Midjourney Pricing for Beginners
Midjourney no longer offers an unlimited free trial, so budgeting for a subscription is part of getting started. The Basic plan covers casual, occasional use, while higher tiers unlock faster generation speeds and more monthly image credits.
For beginners still deciding whether this fits into their creative routine, I’d recommend starting with the lowest tier first. You can always upgrade once you have a clearer sense of how often you’re actually generating images, which is exactly the approach I took while figuring out how to use Midjourney for beginners step by step without overspending early on. Budgeting this way also takes the pressure off your first few weeks, since you’re not worried about wasting a big upfront investment while you’re still finding your footing.
Midjourney vs DALL-E vs Stable Diffusion for Beginners
| Factor | Midjourney | DALL-E | Stable Diffusion |
|---|---|---|---|
| Ease of Use | Moderate, Discord-based | Very easy, simple interface | Moderate to advanced |
| Image Quality | Highly artistic, polished | Clean, realistic | Varies by model used |
| Learning Curve | Moderate | Low | Higher, more technical |
| Cost | Subscription required | Free tier available | Free, open-source options |
| Best For | Artistic, stylized visuals | Quick, realistic images | Full customization and control |
Based on my own testing, Midjourney consistently produces the most visually striking, artistic results, though it comes with a steeper learning curve than DALL-E. Stable Diffusion offers the most flexibility if you’re comfortable with more technical setup, but it’s not the friendliest starting point for absolute beginners still learning how to use Midjourney for beginners step by step alongside other tools.
If your priority is speed and simplicity, DALL-E’s straightforward interface makes it an easier first tool to pick up. If you’re specifically after artistic, gallery-worthy visuals and don’t mind a slightly steeper learning curve, Midjourney remains my personal favorite of the three. Stable Diffusion is worth exploring later once you’re comfortable with the fundamentals and want more granular control over your results, including running models locally if you have the technical setup for it.
Common Beginner Mistakes to Avoid
Writing overly vague prompts is probably the most common mistake I made early on. Simply describing “a beautiful landscape” gives Midjourney very little to work with compared to a detailed, specific description.
Ignoring parameters entirely is another missed opportunity. Even learning just aspect ratio and stylize settings early on can dramatically improve how usable your results are for actual projects. Expecting perfect results on the first prompt is also unrealistic, refining your wording across a few attempts almost always produces noticeably better final images than accepting the very first output.
Finally, not saving prompts that worked well is a mistake I made constantly at first. Once you find a wording formula that consistently produces results you like, keep a running note of it so you can reuse and tweak that structure for future projects instead of starting from scratch every time you sit down to generate something new.
Rushing through the setup process is another mistake worth mentioning. Taking the extra few minutes to properly understand your subscription plan and the basic interface before diving into prompts pays off later, since it removes small confusions that would otherwise interrupt your creative flow while you’re still learning how to use Midjourney for beginners step by step.
Comparing your early results too harshly against polished examples you see shared online is also worth avoiding. Those images often represent someone’s best result out of dozens of attempts, not a typical first try. Giving yourself the same room to experiment and fail a few times before judging your progress makes the whole learning process far less discouraging.
Who Should Try Midjourney as a Beginner?
Bloggers and content creators benefit from having a quick source of custom visuals instead of relying entirely on stock photography. Small business owners can generate marketing graphics and social media visuals without hiring a designer for every small project.
Hobbyists and creative writers often use it purely for inspiration, visualizing characters or scenes from their own stories. Even complete beginners with zero design background tend to get comfortable within their first few sessions, since the barrier to entry is really just learning how to describe what you want clearly, which is the whole foundation of learning how to use Midjourney for beginners step by step in the first place.
I’ve genuinely found that anyone willing to spend a single afternoon experimenting can pick up the core skills needed for how to use Midjourney for beginners step by step, regardless of prior creative or technical background. If your creative process also involves interviews or recorded brainstorming sessions, my Otter AI Review covers a transcription tool that pairs surprisingly well with this kind of visual, creative workflow.
If you’re just getting started with creative AI tools in general, it’s worth building a small toolkit around your specific workflow rather than sticking to just one platform.
Practical Beginner Projects to Practice With

Rather than generating random images with no direction, I found it far more useful to practice with small, real projects in mind. This gives your prompts a purpose and makes it much easier to judge whether a result actually worked.
Try creating a set of blog thumbnails around a single topic you write about often. This forces you to think about consistent style and color palette across several prompts, which is genuinely one of the fastest ways to improve. Designing a simple social media avatar or profile graphic is another approachable first project, since the stakes feel low but the skills transfer directly to more ambitious work later.
If you’re more creatively inclined, try illustrating a scene from a story you’re writing, or a character description you’ve had in your head for a while. Seeing your own imagination rendered visually, even imperfectly, tends to be one of the most motivating first experiences beginners have with this tool. If writing is part of that creative process too, my Claude AI for Beginners guide covers a solid AI writing assistant worth pairing with your visual work.
Small business owners might practice by generating a handful of product mockup backgrounds or simple promotional graphics. Even if you don’t end up using the exact output commercially, the practice of writing focused, purposeful prompts speeds up your overall learning curve significantly compared to generating images with no clear goal in mind.
My Honest Take After Learning It Myself
Looking back at my confused first attempt, I’m glad I stuck with it long enough to actually understand what I was doing. What felt intimidating and technical at first turned into one of the more enjoyable creative tools I use regularly now.
If you’re just starting out, don’t overthink your first prompt. Generate something simple, see what comes back, and let yourself get comfortable with the process before diving into more advanced parameters and settings. That patience is really the secret to learning how to use Midjourney for beginners step by step without getting discouraged early on.
Conclusion
Learning how to use Midjourney for beginners step by step really isn’t as complicated as it might seem from the outside once you break it down into individual steps. Once you understand the basic setup and how to structure a clear prompt, it quickly becomes an enjoyable, genuinely useful creative tool.
Whether you’re a blogger, a small business owner, or just someone curious about AI-generated art, this step-by-step approach to Midjourney gives you a solid foundation to build on. Give yourself a real week to experiment, and I think you’ll be surprised by how quickly it becomes second nature.
I’d also encourage you to revisit this guide periodically as you get more comfortable, since certain sections, like parameters or remixing, tend to make a lot more sense once you’ve already generated a handful of images and have real context to apply them to.
At the end of the day, learning how to use Midjourney for beginners step by step comes down to patience, curiosity, and a willingness to refine your prompts as you go. Start simple, stay consistent, and the results will speak for themselves. If you ever feel stuck, come back to this guide on how to use Midjourney for beginners step by step and revisit the basics before jumping into more advanced techniques.
🔗 Explore More AI Tools Guides
Looking for more AI tools, tutorials, and honest reviews? Explore these hand-tested guides from AppProofed.